Groups and Users
Groups are a handy tool for organizing and managing your users. You can manage permissions for individual accounts, but in general it will be more efficient to group your users and set privileges based on these groups.
Default Groups
Arches installs with a handful of pre-existing groups with permissions already set to help organize users. Groups are managed from the Django Administration page where all users and groups are created as well as edited.
Tip: It’s best to leave the default groups that come with Arches intact and create your own new groups if you want to create different permission configurations.
Managing groups (Django admin)
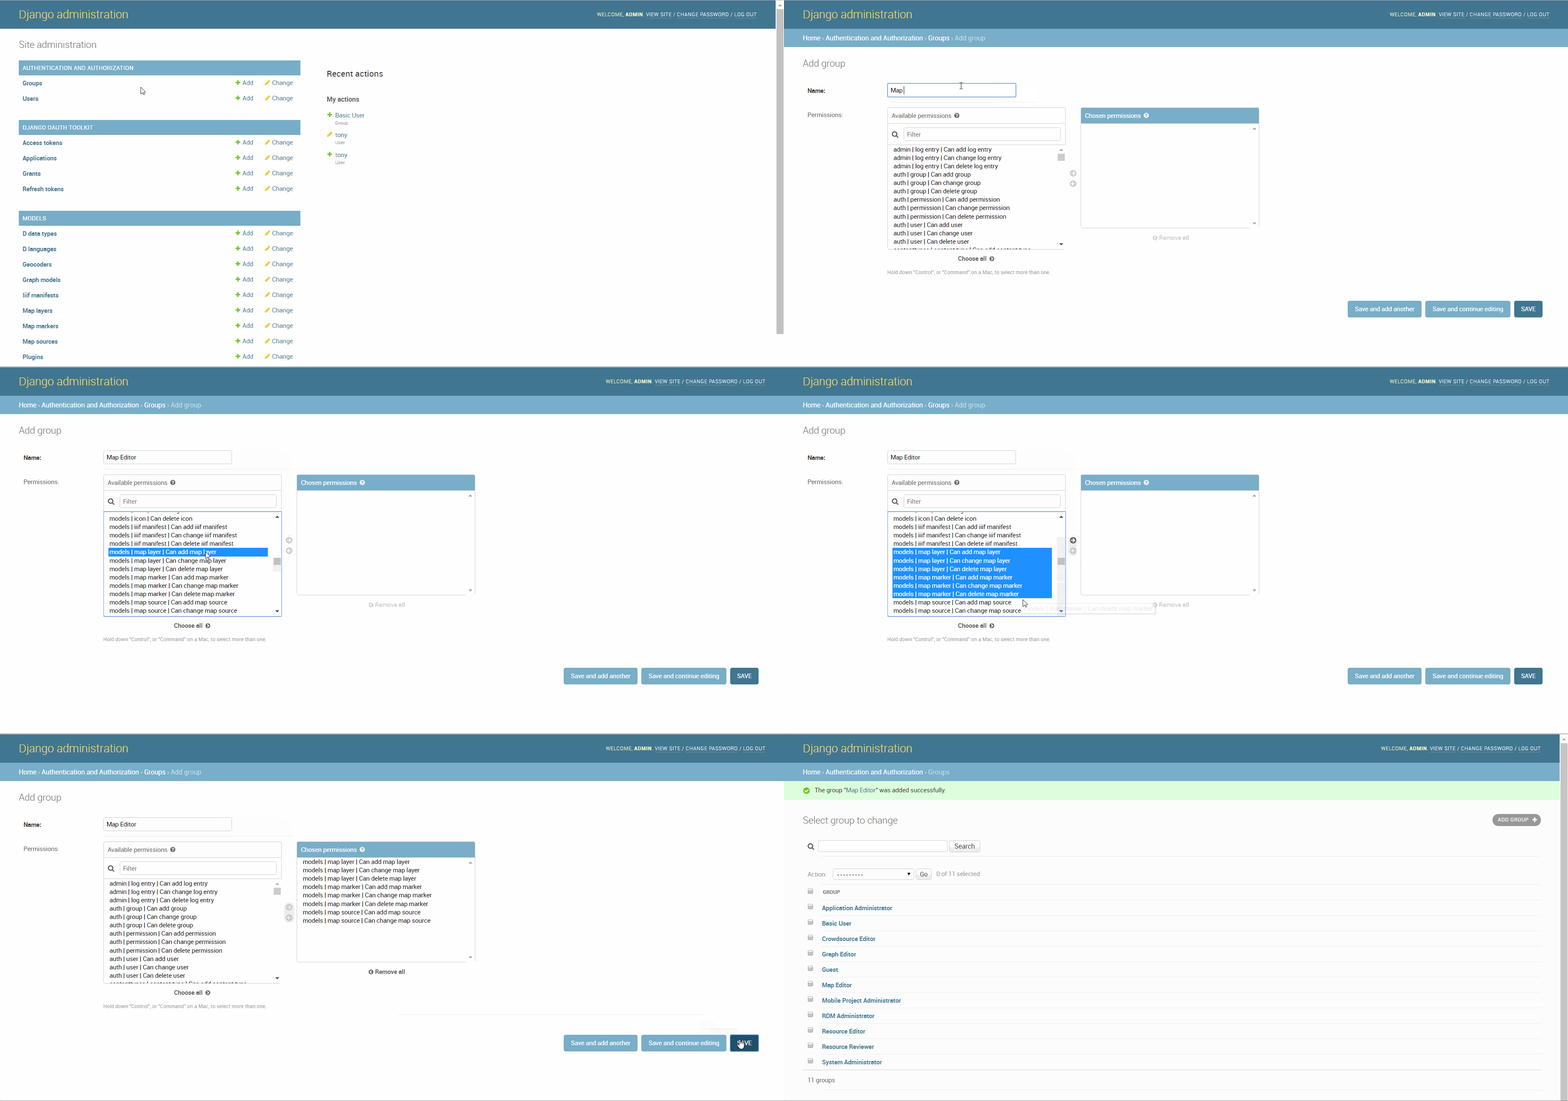
To create a new group for your project with custom permissions:
- Navigate to YourArchesHost/admin/
- Under ‘Authentication and Authorization’ find the row labeled ‘Groups’ and click the
button on the right
- Give the new group an appropriate name
- Set the permissions you want users added to this group to have access to by selecting them under ‘Available Permissions’ and using the arrows to move them into ‘Chose Permissions’
- Click
in the bottom right, you can now add users to this group

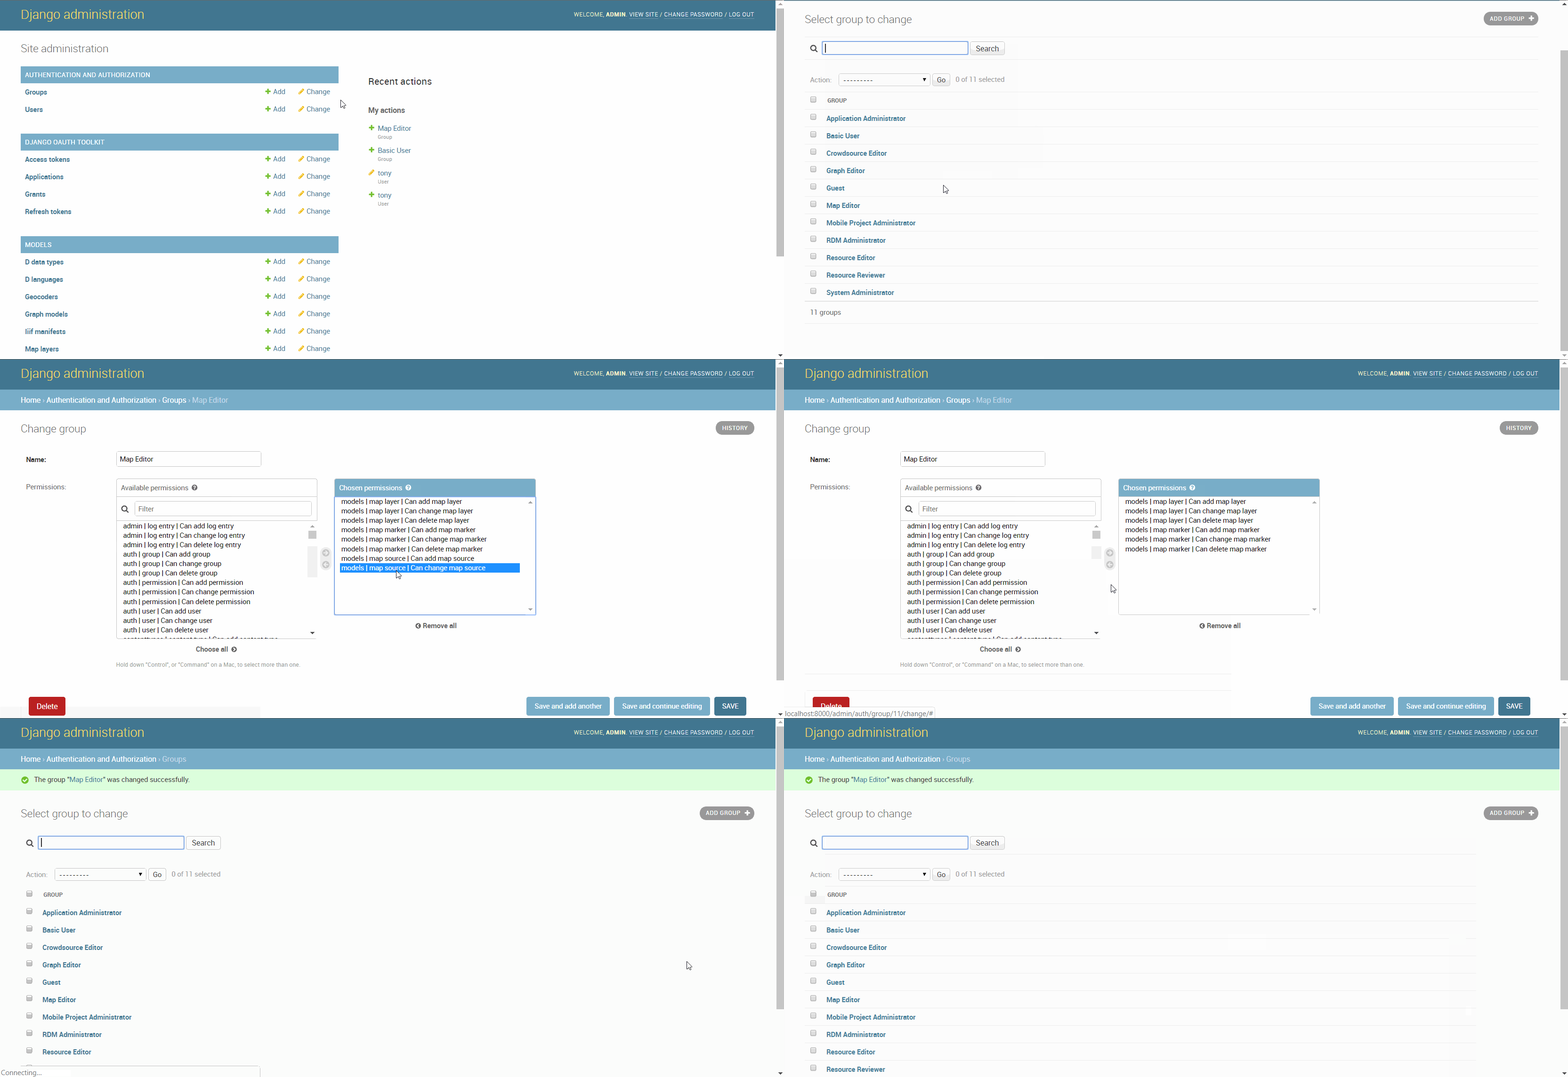
To Edit an existing group:
- Navigate to YourArchesHost/admin/
- Under ‘Authentication and Authorization’ find the row labeled ‘Groups’ and click the
button on the right
- Click on the name of the group you wish to edit
- Edit the name of the group if you wish
- Add any new permissions you want the group to have access to or remove any permissions you no longer want the group to have access too
- Click
in the bottom right to administer these changes to the group
